
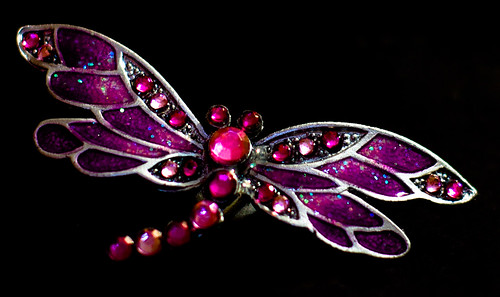
Jewelry Refrigerator Magnets
Here's your opportunity to reuse/recycle some of those brooches/pins in your jewelry box or to pay a trip to your local thrift store (or visit some garage/estate sales) in search of thrifty treasure to turn into special gifts. The basic idea is that you're removing the back part of the jewelry and affixing a magnet to it. I could easily see sewing a little cloth bag or decorating a small box and tossing a few of these in for a pretty and sparkly gift.
For detailed instructions on how to make this happen, here's a written tutorial (with photos), and here's a video. (Here's the URL for the video, just in case.
Mason Jar Lid Coasters
If you visit this blog regularly, you'll know that I'm rather fond of DIY coasters. So these mason jar lid coasters are right up my alley. I've seen them with the lid painted, the cork liner decorated in numerous ways (including colored patterns) and others, like these on Amazon that are more rustic. You'll find many on Etsy, on Amazon, and elsewhere.

You can, of course, make your own. Here's a link to some instructions (these have lids that are spray painted, but you can, of course, leave yours the traditional silver). And here's a video
If you don't care for the mason jar lip part, you can always cut shapes from the cork and decorate those. The lid isn't really necessary, I suppose.
Key Chain Wristlet
I'm not a super fan of key chains, because...how many do you need and don't we all have more than enough? But these were so pretty and easy, and they had the added convenience of being a wristlet (I'm always worried I'm going to drop my keys), so here goes.
You'll find some pretty ones online. Try Etsy and Amazon.

But here are some simple instructions. Very few materials are needed. The ribbon is stitched to the cotton webbing and then inserted in the key fob, so not much sewing is needed. Most of the videos I saw demonstrated this sewing method, but I also saw one where fusible tape (iron-on tape) was used to affix the ribbon to the webbing and also one where only fabric glue was used. The very short video (here and below) uses both the fusible tape and stitching, so it's all up to you whether you prefer to stitch the ribbon to the webbing or to fuse/glue the parts together.
That's all for today. It looks as if I have plenty of simple crafts to get me started. More to follow.
Have a great day! (Also, check out my book pages. I've finally got them up on the site again).
Myrna
2 comments:
Hi,
I lost you for quite a while. Glad to be back.
I'm one of those crazy people that make things all year round ready for Christmas, birthdays, just because..
Hi Mary,
I'm thrilled to see you again! I was afraid that in all the mess of splitting the blog and the website, we'd lost you. (After I made that choice, I had a terrible time trying to figure out how to get Google to inform followers where we were, but things are slowly returning to normal).
And I would say that you're efficient rather than crazy. Despite my good intentions, I'm always rushing, which is not a good way to be, but it sounds as if you're ready for any event.
Post a Comment